
Category Archives: Art
Huge collection of Disney Clipart (including 90s TV favorites!!)
While searching around for graphics for a current project I found DisneyClips.com. It’s stuffed to the brim of free-for-non-commercial-use Disney clipart, not only of Disney princesses and Mickey and the gang, but also of pretty much EVERY Disney movie ever made. And the 90s TV shows, people! Stuff like:

Tailspin is probably one of the most looked-over old Disney shows, but it was pretty clever to turn the Jungle Book characters into their own show!

Sad that a lot of kids today have no idea who Uncle Scrooge is.

Anyone else remember the Darkwing Duck Stage show that was in the Magic Kingdom in the mid 90s??

This was a great show…looking back I realize how dark and serious it was, it wasn’t really a normal kids show but boy, it was good.

Chip is still one of my favorite cool guys!
How To Recolor Sprites in Gimp (A Very Simple Guide)
Ever wanted to change the color of a sprite character’s outfit, their eyes or their hair? It’s very easy and simple to do using an art program (such as Gimp which is free) and even beginners can make nice color changes! Follow along as I turn Elli’s dress from blue to pink:
1: Open up your sprite in Gimp and zoom in about 800%. You want the sprite large enough that you can easily see the pixels.

2: Using the Select By Color Tool (it looks like a hand pointing to a bar colored blue, red and yellow and is generally in the top right hand corner of your toolbox) select the lightest color of the object you want to change. It’s important to start with the lightest color as you can then easily darken the color bit by bit for the shading.

3: Using the Paintbucket tool, fill the selected areas in with the color of your choice. You can quickly fill in all the areas by holding down Shift while selecting one of the highlighted areas – this will automatically fill them all. While this is a great time saver, sometimes you will have to select each area individually if the color is used in other areas you want to leave as-is.

4: Using the Select by Color tool, select the next darkest area of the object you’re changing. Then, using the color selector, pick a color that is darker than your original color. Make sure it’s the equivalent darkness to the shade you are replacing – if it’s too light or too dark, it will look odd.


5: Repeat the process to fill in all the remaining shades until you have completely replaced the old color scheme with your new one. The most important thing to remember is to match the shades that you’re replacing, otherwise the shape and shading will look off.

6: Zoom back to normal magnification and see how your sprite looks now.

7: There, she’s looking pretty good! Now I’m going to quickly repeat that whole process to change her bow to a more fitting color to match her dress:


8: Now let’s compare our original Elli next to her new version:


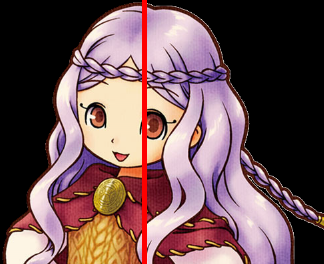
And there you have it! You can use this method to change any color on a sprite, but be aware that the more colors you are replacing, the more attention you have to pay to replacing the shades exactly. Hair is one of the most difficult things to change because there is generally so many shades to replace and often the color of the hair is used elsewhere on the character, meaning you have to be careful exactly what you replace. Elli has the same brown color of her hair outlining her face – changing her hair would be quite a project. The easiest color to change is one that isn’t used elsewhere on the character – for example, Nami:

Her red hair is easy to change because the colors don’t blend into her face or outfit. So it’s easy to make her, say, a blonde (with purple eyes, no less!):

Finally, remember to save your work often! If you successfully change the color of a character’s shirt, save your work before you try to tackle another object. That way if you mess up, you won’t have lost all your recoloring work.
Merry Geeky Christmas!

Annnnnnd that’s my geeky Christmas contribution :) Just a Christmas tree ball I painted up a bit to make R2D2. Didn’t come out great though as I didn’t use the right type of paint.
That’s it for me until after Christmas. May you all have a nice holiday :)
How to quickly and easily crop an image in Gimp
In my many artistic/coding/digital endeavors, I find myself with that same old problem of wanting to use an image for something – but it has that nasty white space behind it! And usually the only method (that most people know) to remove it is to slowly crop it by hand.
I hate cropping pictures.
So I fiddled around in gimp and found a fantastically easy way to cheat at cropping! :D
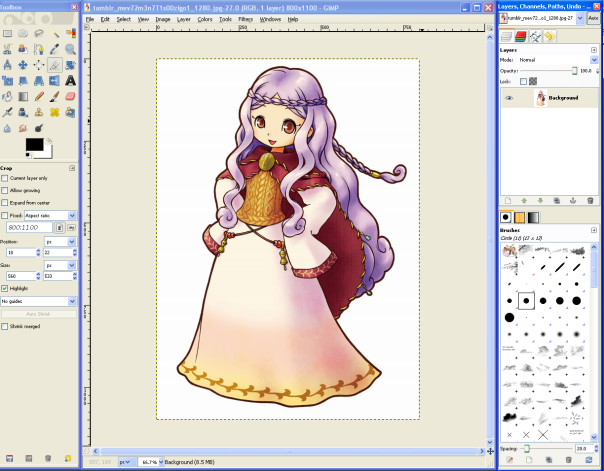
To start, open your image up in gimp. The image I’m using is Oracle from the game Harvest Moon: Tale of Two Towns.
1. Go Layer > Transparency > Add Alpha Chanel. Next, using the Magic Wand tool (circled in red below) select the white space around your image and delete it. You’ll get rid of most of the white space.

2. Now add a second layer to your project, move it under your image and fill it with black. Ahhh, see all that nasty white residue still clinging to your character? Not what we want.
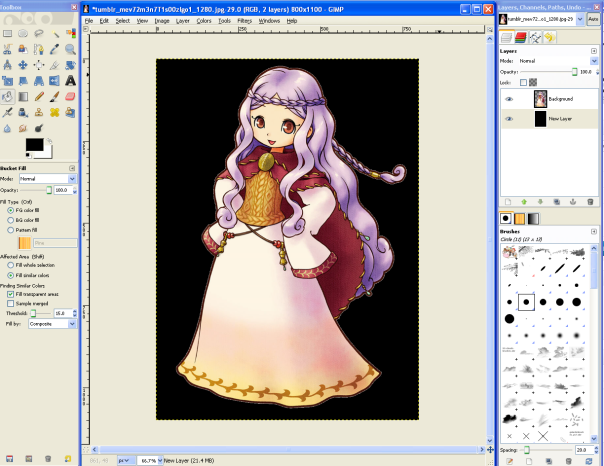
3. Using the Magic Wand tool again, select around your character, then go Select > Invert. Next, go Select > Shrink and shrink the image by 1 pixel.

4. Now go Select > Invert (again!) and then press delete and unselect the image so you can get a good look at it. Hey! All that white is gone from around the character! Pretty neat, huh? Here’s a comparison of before and after:
5. Whoops, okay, so nearly all the white. There’s a few spots that managed to sneak by:
6. To get rid of these, you’ll have to use the Free Select Tool (looks like a little lasso by the Magic Wand) to select the areas, and then delete them. Like so:
7. Now remove the colored layer and save your image (make sure to save it as PNG to save the transparency!). And here she is, all cleaned up and ready to go on any colored background you choose! :)
R2-D2 For Girls


Like usual, the links in the pictures will take you to the sources. Found this stuff while looking up images of R2-D2 – I’m designing a R2 themed crochet project (though it probably won’t see the light of day for months…)
Crocheted Kirby (more old projects)
So I also found some of my older art projects while organizing my computer files. This is the Kirby I made my BF as a birthday gift last year. This is NOT one of my original patterns; I got the pattern for it here (so go make your own! :D)


Cat Comics I doodled
Earlier this year I doodled up some rough comics based around one of my family’s cats, our big, fluffy Maine Coon named Rockey. I found them while organizing files today and thought I’d post ’em up. The black cat that also appears in the second comic is Winkey, our very sleek girl cat. She and Rockey hate each other with a vengeance.


Crocheted Flower Case for Kindle eReaders
")
")
Told you I’d be working on some new projects! This is a sleeve I crocheted for my mom’s kindle (an early Christmas gift). The largest purple flower is actually part of the closure. You can find more pictures and instructions on how to make it here on instructables.com.
Cute Eraser Charm Jewelry

Hope over to Instructables.com to see my instructable for these cute charms made from little erasers!
Also, new page up with random things I like. Just ’cause.
